
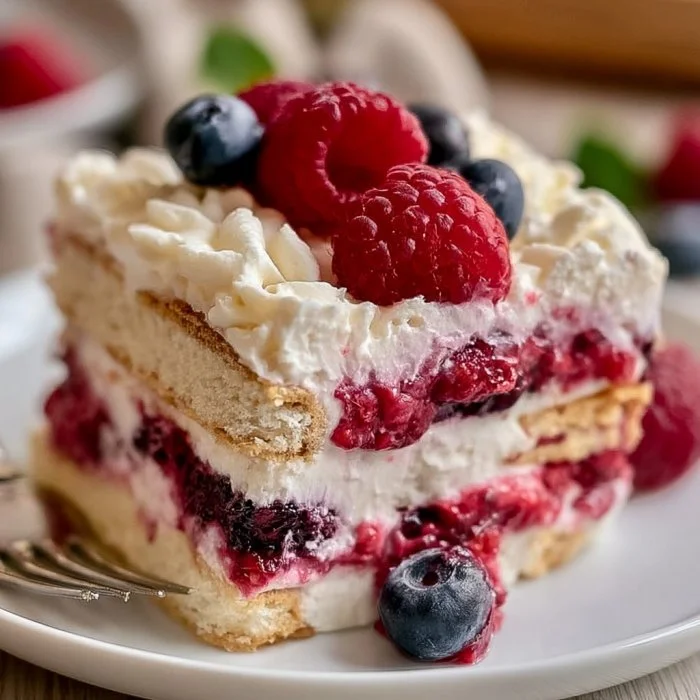
A Delightful Dessert Treat
A No-Bake Mixed Berry Icebox Cake is the perfect answer for those hot days when you crave something sweet but don’t want to turn on the oven. This cake is light, refreshing, and bursting with fresh flavors. The combination of creamy whipped topping and fruity mixed berries creates a delightful taste experience. It’s an easy dessert that’s satisfying yet won’t weigh you down.
The texture of this icebox cake is creamy and smooth with a slight crunch from the graham crackers. When layered properly, each bite offers a wonderful mix of textures. This cake is best served cold, making it an excellent choice for summer gatherings, picnics, or even as a light finish to a hearty meal. It’s a showstopper at parties, sure to wow your guests!
Nutrition & Recipe Details:
Item Value Prep time20 minutes Cook time0 minutes Store time4 hours or overnight Calories180 per serving Protein2g Carbohydrates25g Fat8g How to make No-Bake Mixed Berry Icebox Cake
Ingredients:
Ingredient Quantity Graham Crackers2 cups Whipped Cream2 cups Sugar1/4 cup Mixed Berries4 cups Step-by-Step Instructions:
- Prepare the Ingredients: Start by gathering your graham crackers, whipped cream, sugar, and mixed berries. Make sure the berries are washed and dried if needed.
- Crush the Graham Crackers: Using a food processor or a zip-top bag with a rolling pin, crush the graham crackers until they resemble fine crumbs. This will be the foundation for your cake layers.
- Mix Whipped Cream and Sugar: In a large bowl, combine the whipped cream with sugar. Gently fold them together until well mixed. This mixture will be your creamy layer and should be light and airy.
- Layer the Ingredients: Begin layering your cake by spreading a thin layer of the whipped cream mixture at the bottom of a dish. Add a layer of graham cracker crumbs, followed by a layer of mixed berries. Repeat until all ingredients are used, finishing with a layer of whipped cream.
- Chill: Cover the cake with plastic wrap and place it in the refrigerator for at least 4 hours, or overnight if possible. This allows the flavors to meld and the cake to set.

Pro Tips:
Tip Description Use Fresh Berries Using fresh berries enhances the flavor and ensures your cake is vibrant and colorful. Frozen berries can work but may add extra moisture. Make Ahead This cake tastes even better the next day. Consider making it a day ahead for best results. Experiment with Flavors Add other fruits like bananas or peaches for a unique twist! Why You’ll Love This Recipe
The flavor of a No-Bake Mixed Berry Icebox Cake is one of its biggest draws. It’s sweet and creamy, with bursts of tartness from the berries that keep it refreshing. The simplicity of the recipe is another highlight; there’s no complicated baking or extra steps involved. You can whip it up in under 30 minutes, make it ahead of time, and simply serve it later!
This icebox cake fits various dietary preferences. It’s a great option for gatherings, whether you’re trying to accommodate kids or adults. It can easily cater to vegetarian diets and is low in sugar if you adjust sweetness with alternatives. Perfect for warm-weather events, it’s an easy way to serve up dessert without any fuss!
How to serve No-Bake Mixed Berry Icebox Cake
Presentation plays a key role in dessert! Serve your icebox cake straight from the refrigerator in a glass dish to show off those beautiful layers. You can even layer it in individual cups for a fun personal touch, making it easy for guests to grab and enjoy.
For side dishes, consider serving it alongside a simple scoop of vanilla yogurt or ice cream to enhance the creaminess. Light drinks like iced tea, lemonade, or sparkling water pair brilliantly with this refreshing dessert. Garnish with fresh mint leaves for an added pop of color and flavor!
How to store No-Bake Mixed Berry Icebox Cake
Storing your No-Bake Mixed Berry Icebox Cake is very straightforward. It can stay in the refrigerator for up to 3 days. Make sure to keep it covered with plastic wrap or in an airtight container to prevent it from absorbing any odors from your fridge.
If you wish to keep it longer, you can freeze individual slices. Wrap them tightly in plastic wrap, then place them in a sealed container. This way, they’ll last for about 1 month. Thaw in the fridge overnight before serving for the best texture.
Tips to make No-Bake Mixed Berry Icebox Cake
- Use Sweet Variations: If you prefer a sweeter cake, you might increase the sugar slightly or top the cake with a sprinkle of powdered sugar just before serving.
- Layer Strategically: Make sure to press each layer down gently to ensure they hold together well once chilled.
- Mind the Berries: If using larger berries like strawberries, consider slicing them for easier layering. This helps ensure a good distribution of fruit in every slice.
Variation
Feel free to switch things up! For a vegan version, opt for coconut whipped cream and vegan graham crackers. If you’re into a lighter dessert, consider using a low-fat whipped topping. For a gluten-free option, use gluten-free graham crackers, making it accessible to those with gluten sensitivities.
Storage and Reheating
This dessert is best served chilled and does not need reheating. If you find yourself with leftovers, keep them properly stored in the refrigerator as mentioned. Adding a simple layer of whipped cream on top before serving leftovers can freshen up their appearance and flavor!
Customization Ideas
Get creative by experimenting with flavors! You can add lemon or lime zest to the whipped cream for a zesty kick. Toppings like shredded coconut, or nuts can add interesting textures. For an adult twist, try incorporating a layer of lemon curd or fruit compote for added depth!
Common Mistakes to Avoid
- Too Much Moisture: Avoid using overly ripe berries that might release too much juice. Quality and firmness matter!
- Skipping Chilling Time: Don’t rush the chilling process. Allow the cake to set long enough to achieve the right texture.
- Not Layering Evenly: Make sure to layer evenly. Too little of one ingredient can result in a flat-tasting cake.
- Forgetting to Cover: Leaving the cake uncovered can lead to stale flavors. Make sure to seal it tightly in the fridge.
Serving Occasions
This delightful No-Bake Mixed Berry Icebox Cake is ideal for various occasions, like summer BBQs, family gatherings, or a light dessert after dinner. It’s versatile enough to serve at birthday parties, picnics in the park, or holiday celebrations.
Why make this recipe
This No-Bake Mixed Berry Icebox Cake stands out because it combines ease and freshness without compromising on taste. Unlike traditional cakes that take time to bake, this recipe allows you to create something special in a fraction of the time. The beautiful dessert is not only pleasing to the eyes but also a delicious way to enjoy seasonal berries, making it a perfect offering for any occasion.
FAQs
1. Can I use frozen berries instead of fresh?
Yes, you can use frozen berries. Just be mindful that they may release more moisture, so you may want to let them thaw and drain the excess juice before using.
2. How do I make this cake gluten-free?
To make a gluten-free version, substitute regular graham crackers with gluten-free options available at your local grocery store.
3. How long will this cake last in the fridge?
The icebox cake can be kept in the refrigerator for up to 3 days, as long as it is properly covered.
4. Can I add different fruits?
Absolutely! Feel free to add fruits like peaches, bananas, or cherries to customize the cake to your taste.
5. Is there a dairy-free option for this recipe?
Yes! You can use coconut whipped cream or any plant-based whipped topping as a substitute for dairy whipped cream.
Disclaimer
Please note that the nutritional values are approximate and depend on the specific ingredients used. Always check your brands and serving sizes for the most accurate information.